Introduction
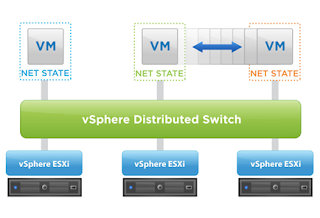
With vSphere 5 comes a plethora of new features and functionality across the entire VMware virtualization platform. One of the core components that got a nice upgrade was the vSphere Distributed Switch (vDS). For those of you that have not had the chance to use the vDS, it is a centralized administrative interface that allows access to manage and update a network configuration in one location as opposed to each separate ESX host. This saves vSphere administrators or network engineers a lot of operational configuration time and/or scripting activities. The vDS is a feature that is packaged with Enterprise Plus licensing. Here are some of the new features that are included with the vDS 5.0:
- New stateless firewall that is built into the ESXi kernel (iptables is no longer used)
- Network I/O Control improvements (network resource pools and 802.1q support)
- LLDP standard is now supported for network discovery (no longer just CDP support)
- The ability to mirror ports for advanced network troubleshooting or analysis
- The ability to configure NetFlow for visibility of inner-VM communication (NetFlow version 5)
NetFlow Basics
I could do a write-up on each one of these components as they are all worth discussing in more detail, but I wanted to focus on the NetFlow feature for this post as I think it’s an awesome addition. NetFlow has had experimental support in vSphere for some time, but now VMware has integrated the functionality right into the vDS and is officially supported.
NetFlow gives the administrator the ability to monitor virtual machine network communications to assist with intrusion detection, network profiling, compliance monitoring, and in general, network forensics. Enabling this functionality can give you some real insight into what is going on within your environment from a network perspective. Having “cool features” is a nice to have, but having features that you can utilize and show value back to the business is a completely different value add.
Let’s look at how to setup NetFlow on the new vDS, then take a look at the data you can extract from NetFlow with a third party NetFlow viewer. Once you see the value of the data, you can then make some important IT business decisions on how you need to mitigate risk and protect your investment by getting ahead of the curve (aka VMware vShield or some other third party software).
Ensure you are running VMware vSphere 5.0 and have activated Enterprise Plus licensing to setup the vDS switch in your environment. You can see below the new option to deploy a vDS 5.0 switch, and of course we offer backwards compatibility for those that need to deploy to their 4.x environments. Select the 5.0 version and hit next.

In the “General” section give the vDS a name, in this example I am giving him “dvSwitch5”. Select next the number of network interface cards you want to participate in the switch and then select next.

For each host in your cluster that you wish to participate in the vDS, you will need to configure the network interfaces that will support this vDS implementation. In this example I have selected vmnic 4 and vmnic 5 to be members of the vDS 5 switch. Select next.

That’s it, review the summary and select finish for your vDS configuration to come online and begin configuring NetFlow.

Now you have a fully functioning vDS 5.0 switch, you can actually start to use it! First let’s go ahead and configure NetFlow on the dvPortGroup, then we will move some virtual machines over to the new vDS so we can get some real data flowing. Right click on your newly created dvSwitch and select “edit settings”. Go to the “NetFlow” tab across the top of the page. You will need to give your vDS an IP address so your NetFlow tool will know where to collect the data from. Populate an IP address for the vDS, then you will need to enter the IP address of the collector you plan on using to pull the data from. Make sure you enter the correct port number (default is 1) for how you setup your NetFlow application to communicate

Right click on the dvPortGroup within the vDS and select the “monitoring” option and enable NetFlow so you can begin to collect data.

Move a few VM’s over to the new vDS so you can begin to capture some real data within your newly established NetFlow configuration. I have highlighted below how you can change the network connection on a VM to now utilize the dvSwitch5 we created earlier.

Conclusion
VMware vSphere 5 offers some great new features that are integrated into the new vSphere 5 Distributed Switch. Start to leverage your existing investment by examining your network infrastructure with the NetFlow data you can now begin to extract. Once you have gathered this data, begin considering how you can mitigate some of the security and compliance risks within your organization. VMware vShield is a product that can help you in this regard and will integrate into your current environment.


No comments:
Post a Comment